
Marte Guide
Add a blog to your website
Managing a blog on your Marte CMS website is very simple. You can create and organise posts with a few clicks, customise the design and optimise each publication for SEO without any hassle.
In addition, the main blog page is generated automatically with links to your posts, and you can easily add it to the navigation or with buttons.
Everything is designed so that managing your blog is quick and effective.
Step 1: Enable the blog
- Open the side menu from any page in the editor (three-line button).
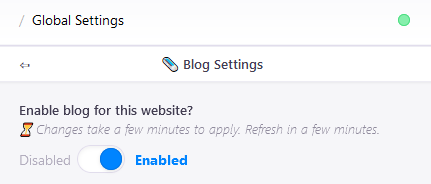
- Select Global Settings and then Blog.
- Change the "Enable blog for this website" option to "Enabled".
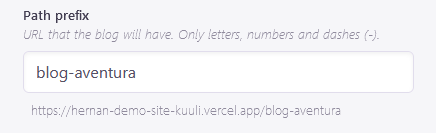
- You can customise the path by typing in lowercase and separating words with hyphens in "Path prefix".
- Add a name for your blog and click the blue "Save" button to apply the changes. Wait a few minutes for it to update.
Step 2: Add a link to your blog page in the Header
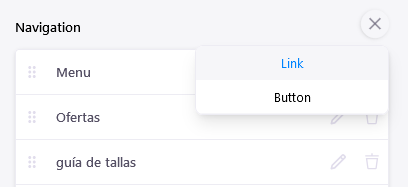
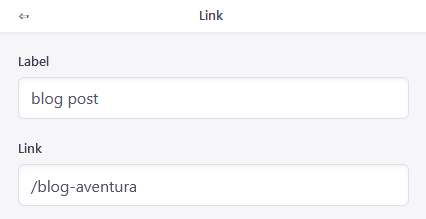
- In the Header editor click the blue + button and select Link.
- Give the link a name and add the path you set in step 1 as shown in the example image.
- Click the blue "Save" button to apply the changes and see your link in the Header to access the blog and all your articles.
Marte CMS Guide
Create posts for your blog
Once the blog is enabled on your site, you just need to open the blog manager, create a new post and set the title, publication date and content. You can also customise each post with images, descriptions and tags to improve the reader experience.
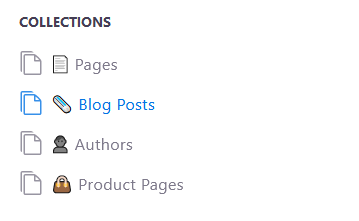
Step 1: Open the blog menu
- Open the management menu by clicking the three horizontal lines and under COLLECTIONS select Blog Posts.
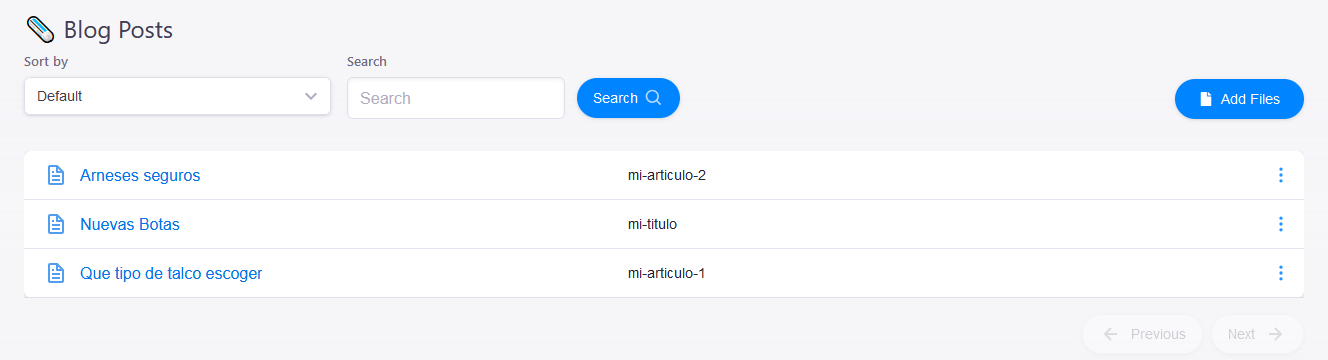
Step 2: Create the post
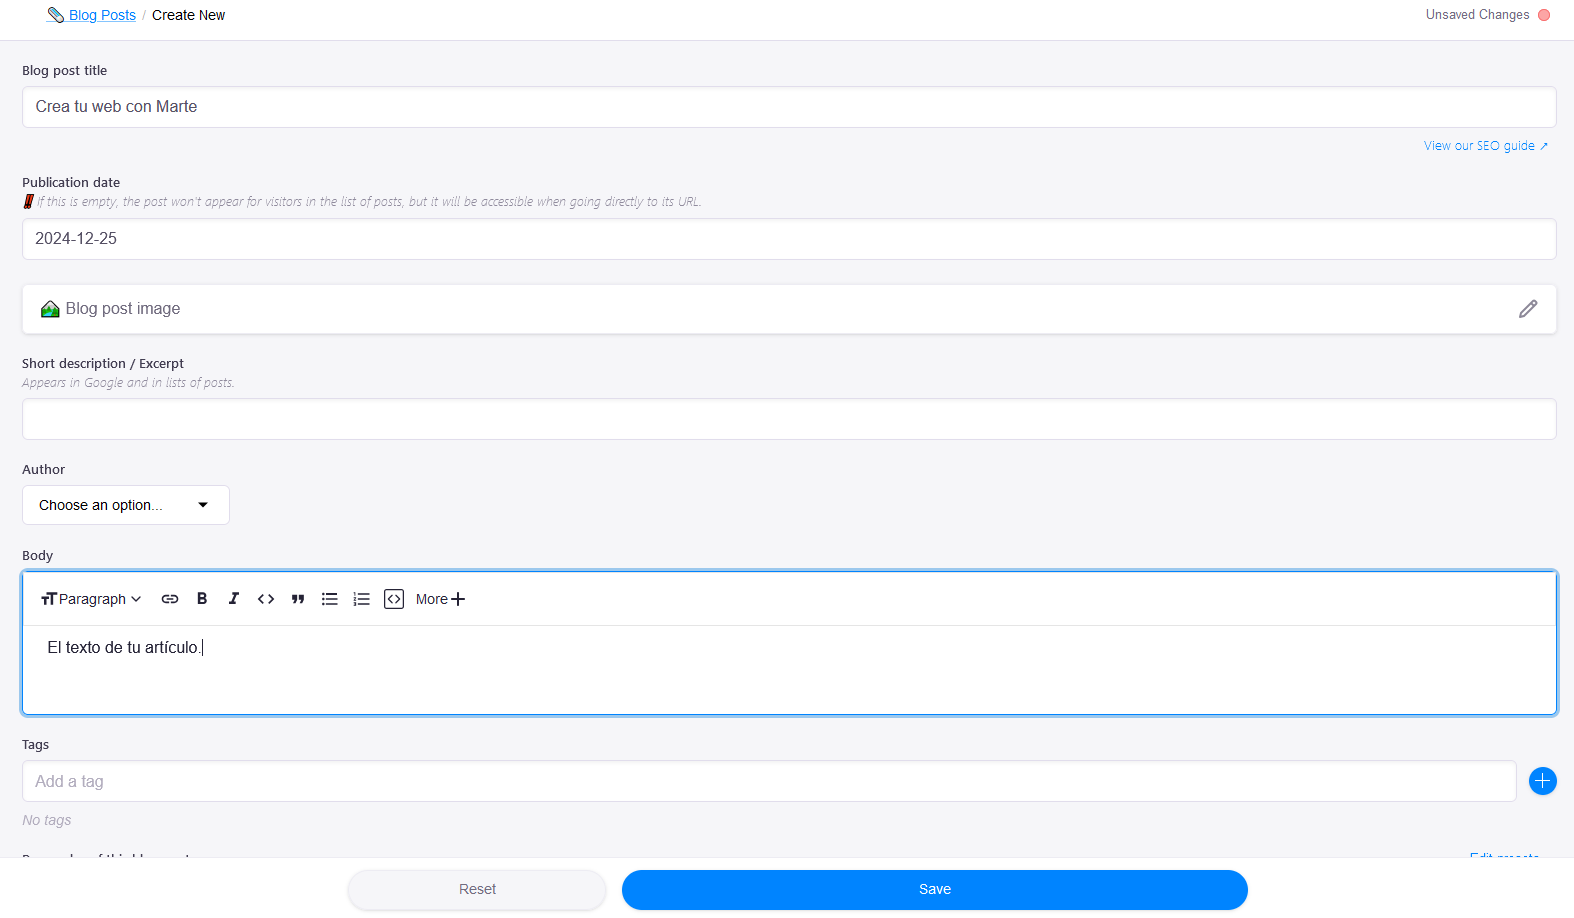
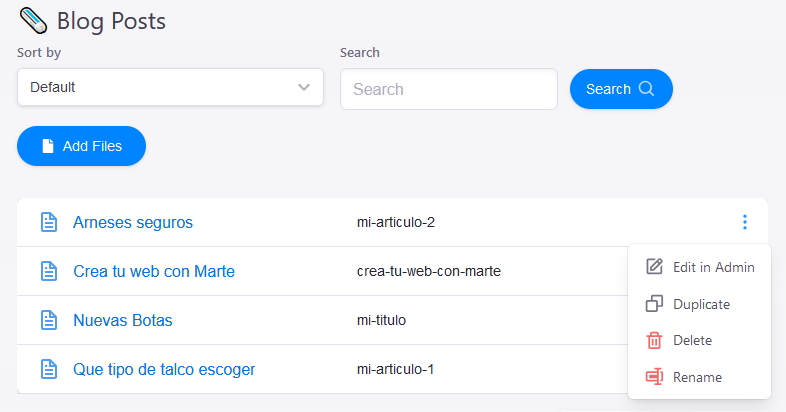
- On the Blog management screen, click the blue "Add Files" button to create a new post.
- Set the title in "Blog post title", publication date, and main content in "Body".
- Note that the post will not appear on your blog until the date is reached. If you do not set a date, you can still access the post via its URL.
- Optionally you can add an image, short SEO description, author, tags and colour.
- Click the blue "Save" button to finish creating your post.
- To edit or delete it, go to the blog menu and select the option you need.
New language feature
With the new multi-language system, blog posts are now shown according to the language they are configured for. So when creating a new post you must indicate which language it is for. To do this, go to the settings panel and click the "LANGUAGE" button.
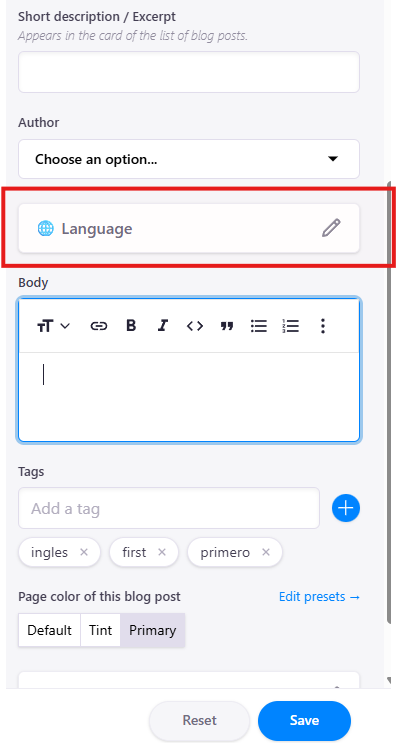
Once there, simply choose the language in which you want that post to be displayed.
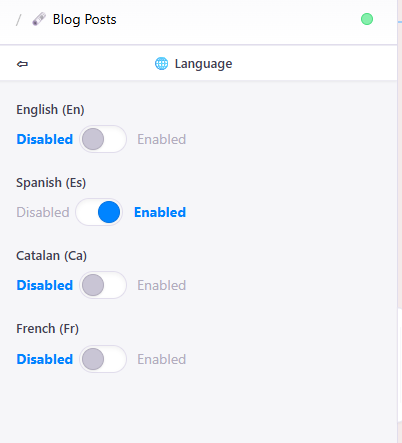
And that's it – your post is ready to be published. IMPORTANT: Even if you do not have the multi-language system on your website, it is still recommended to assign a language.