
Advanced: Bookings
Set up your bookings calendar
What do you need?
For your website bookings to be managed and displayed in Google Calendar you need to: give Marte access to that calendar, copy its ID, paste it into the editor and set the email address where you want to receive notifications. You do it all yourself from Google Calendar and the editor.
Tip: We recommend creating a dedicated calendar for bookings. That way they stay separate from the rest of your activities, you can still see all your calendars together in the Google Calendar overview and, when needed, filter to view bookings only.
Step by step
Step 1
Choose the calendar for bookings
Sign in to the Gmail/Google account where you want to manage your bookings and open Google Calendar.
Decide which calendar to use. If you want a dedicated one for bookings, create it first with the “+” button next to “Other calendars” and give it a clear name, such as “Bookings”.
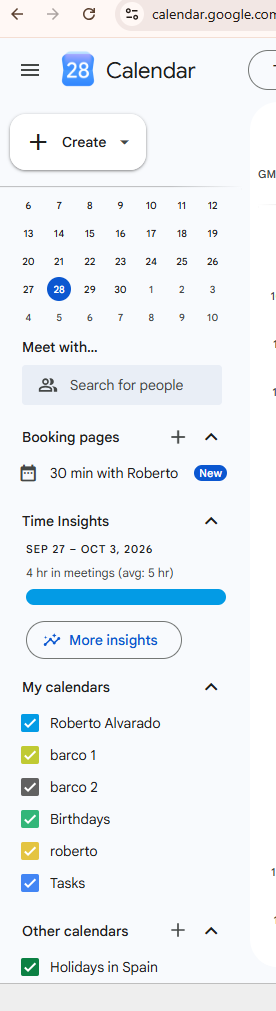
Find that calendar under “My calendars” in the left-hand panel.
Step 2
Open the calendar options
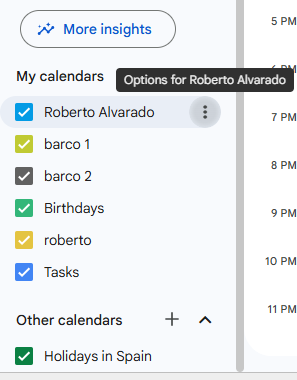
Hover over the calendar name and click the three vertical dots that appear on its right (“Options for…”).
Step 3
Go to “Settings and sharing”
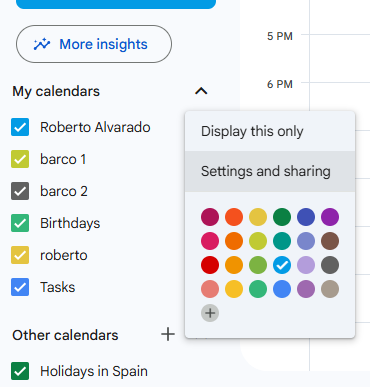
In the dropdown menu, select “Settings and sharing”.
Step 4
Share the calendar with Marte
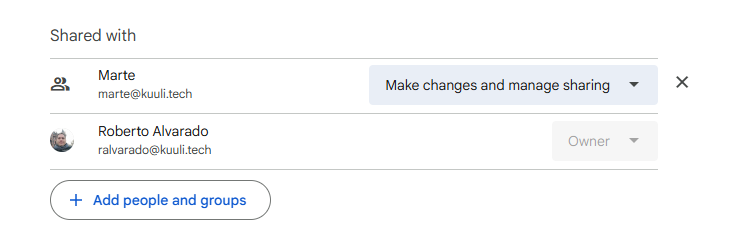
While still in “Settings and sharing”, find the “Share with specific people” section and click “Add people and groups”.
In the email field, type:
marte@kuuli.tech
Under “Permissions”, select “Make changes and manage sharing” and click “Send”. This step is essential: without this permission we cannot sync bookings with your calendar.
Step 5
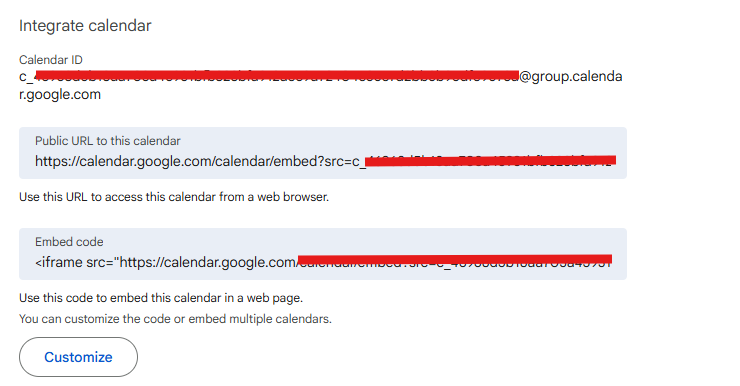
Copy the calendar ID
Scroll down to the “Integrate calendar” section. There you will find the “Calendar ID” field, a long string ending in @group.calendar.google.com.
Copy it in full, with no spaces at the start or end.
Step 6
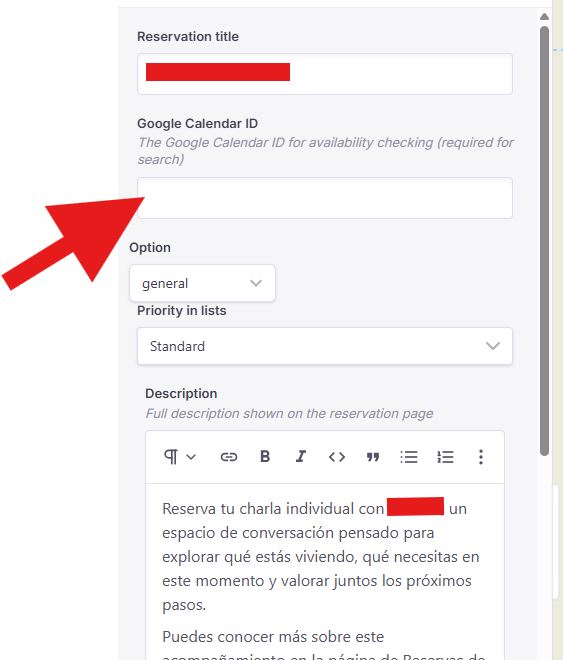
Paste the ID into the reservation page
Open your website editor and go to the reservation page of the corresponding product. In the “Google Calendar ID” field, paste the ID you copied in the previous step and save your changes.
Step 7
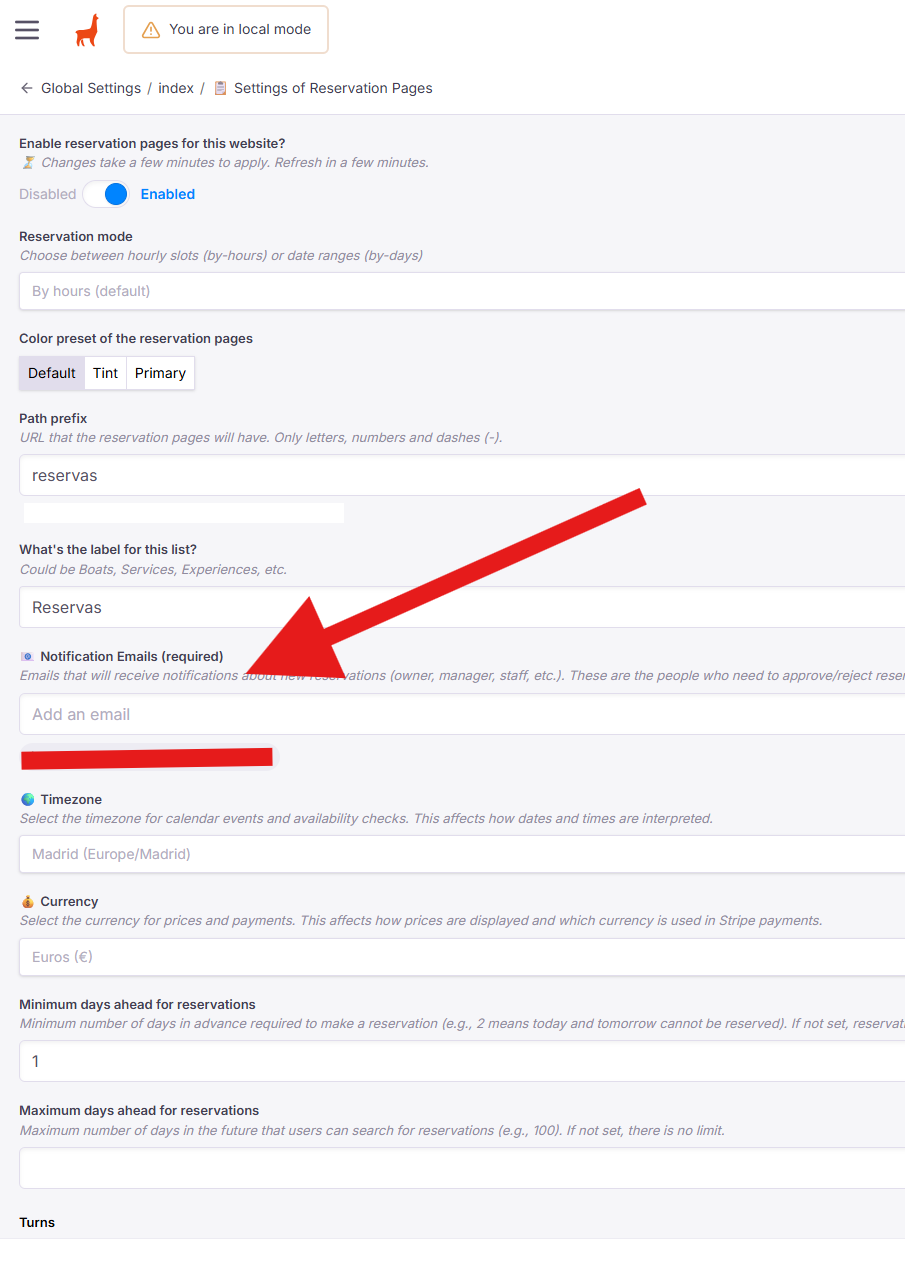
Set the notification email
In the editor, go to “Global Settings” → “Settings of Reservation Pages” and find the “Notification Emails (required)” field. Type the email address where you want to be notified each time a booking is made from your website and press Enter to add it.
Save your changes. From then on, bookings will appear as events in the calendar you selected and you will receive the notifications at that address.
⚠ It is important to save at least 1 notification email: this field is required and cannot be left blank.
Frequently asked questions
Can I use my main calendar?
Yes, but it is not recommended: bookings will be mixed with your personal events. A dedicated calendar is easier to manage.
Where do I find the ID if my screen looks different?
The ID is always inside “Settings and sharing”, at the bottom of the page, under “Integrate calendar”. If your account uses a different language, the labels may vary slightly.
What if I change calendars later?
Repeat steps 1 to 5 with the new calendar and replace the ID on the reservation page in the editor.