
Header
Get familiar with the new features and behaviour of the Header.
Go to Header
Marte Guide
From Marte Website Builder we have developed a new tool that allows websites to display the available languages in their headers. This feature will be available for all sites updated to version 19.0.0.
In the previous version of the multilanguage system, it was necessary to create individual pages for each language. With the new system, all content management can now be done from a single web page, allowing you to manage each language's content independently through a single folder per language, which simplifies organization.
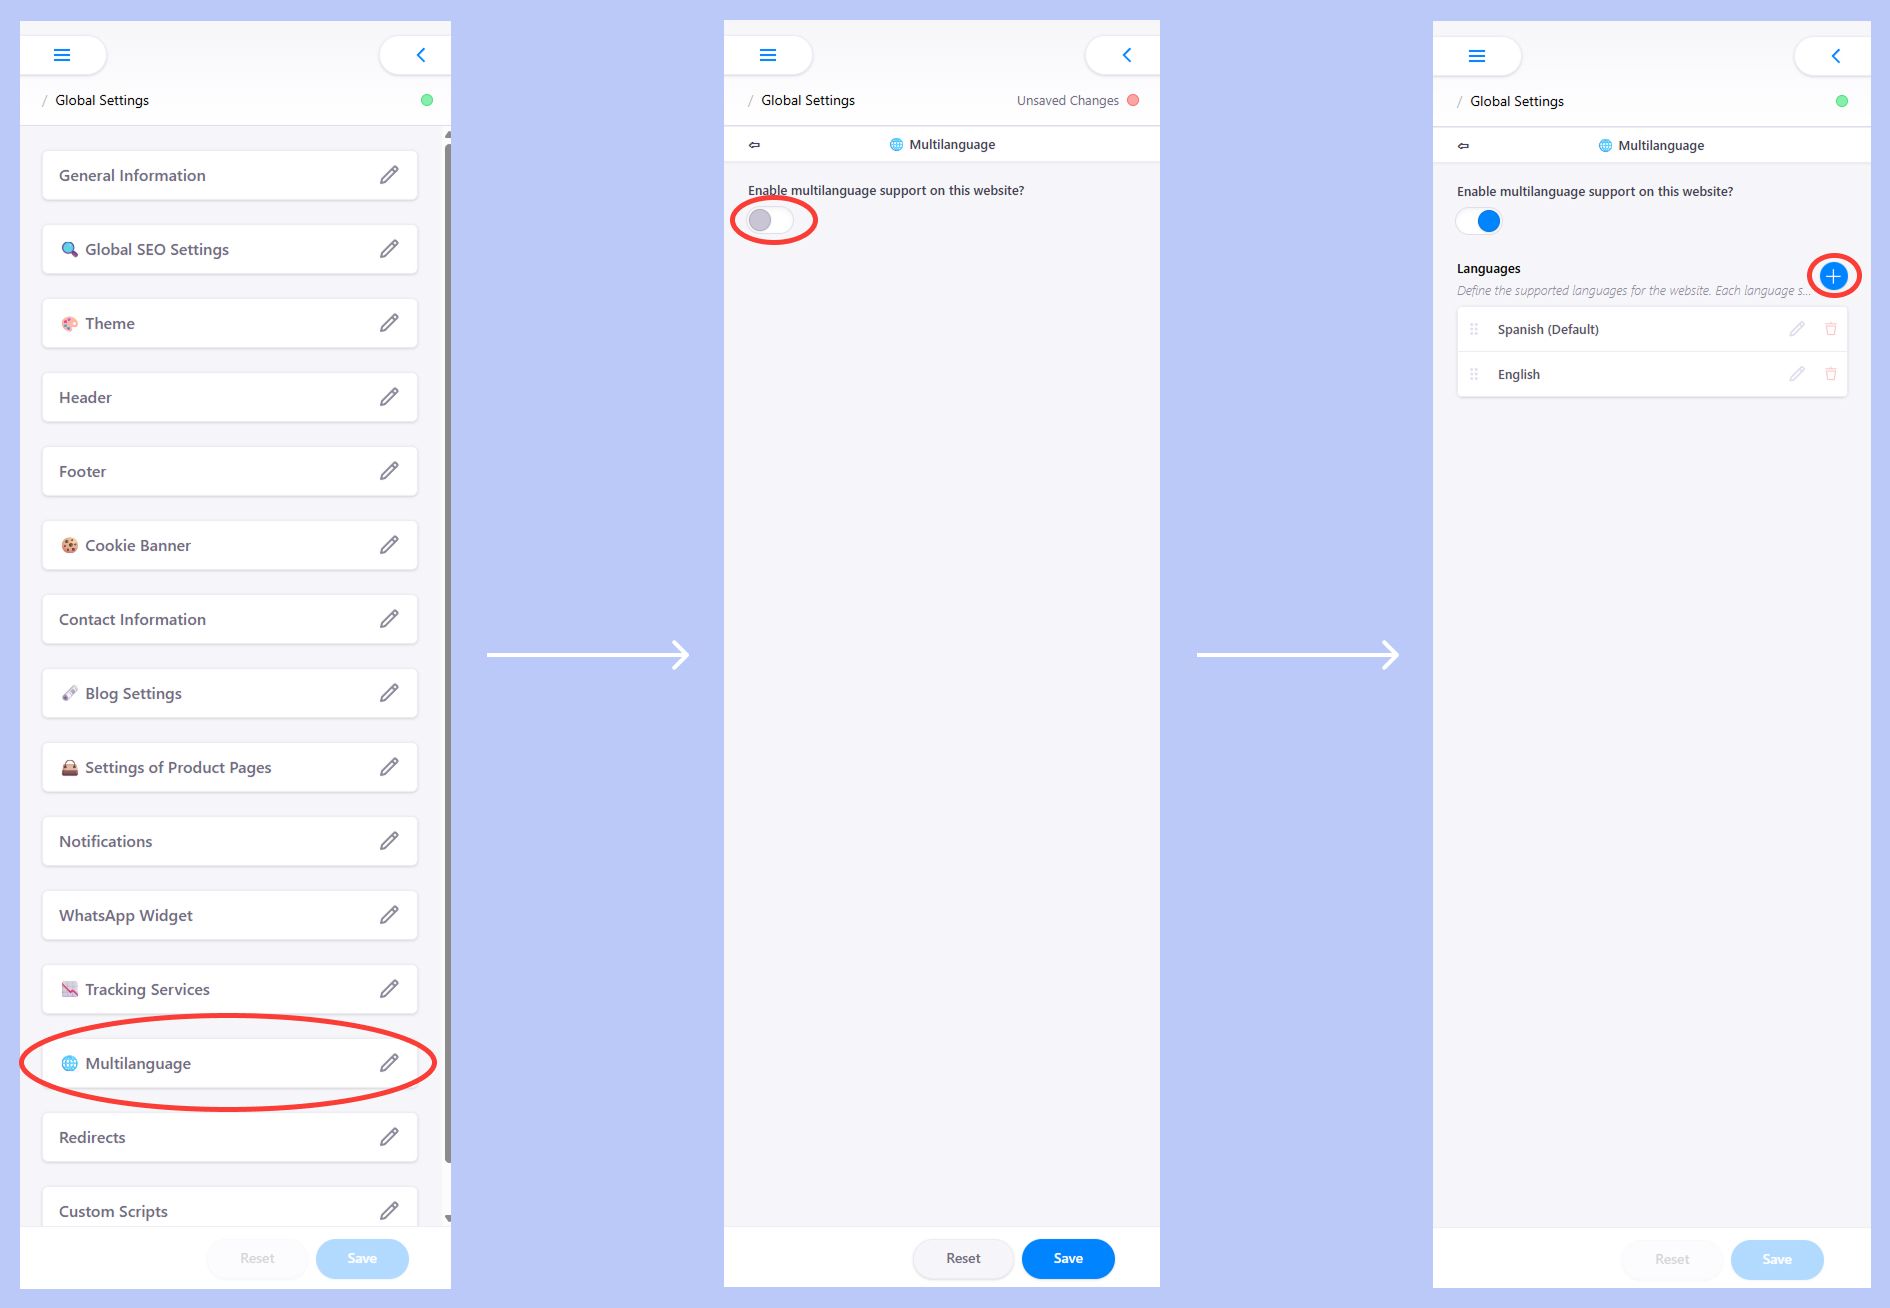
With this in mind, the first step is to activate the multilanguage system. To do this, go to GlobalSetting → Multilanguage.
Here you must enable the system via the toggle. Once enabled, indicate which languages you will work with; this will allow them to be selected in the language selection tab.
For now we have the following languages: Spanish, English, French, Catalan.
Note: Once the multilanguage system is activated, it is important to work only within the folders corresponding to the language you are working in. Any content outside these folders will be disabled and will not be displayed on the website.
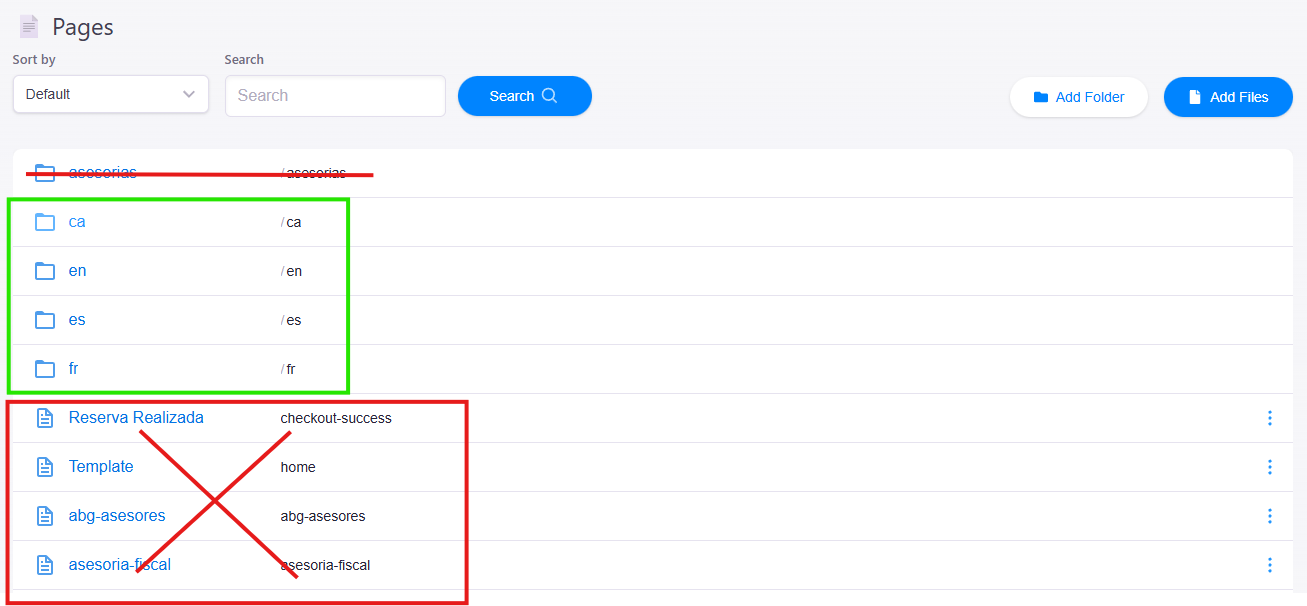
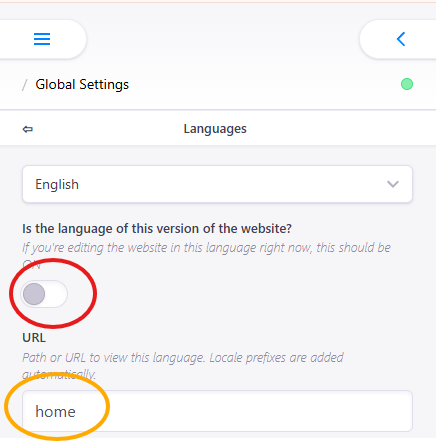
Now that you have finished the initial multi-language setup, it's time to get down to work with the content. We will focus on the sections with the most features.
Get familiar with the new features and behaviour of the Header.
Go to HeaderHow to interact with the new Footer and its sections.
Go to FooterLearn what new aspects you need to consider so your blog section works correctly.
Go to BlogLearn how to configure the different links within the multi-language system.
Go to LinksYou can now create a different Header for each language
We know that there are features or sections that, although they work perfectly in one language, do not fit as well in others. With the new multilanguage system, it is now possible to create different flows per language, showing only what you want to appear in each one.
The first step is to learn how to enter content in the system to correctly configure each section according to the corresponding language.
When you select the header you will see that a "Lenguage" button now appears; when you enter it, a new section of the editor opens with the options for each language (here we fill in the data according to how we want it to appear in the headers of each language).
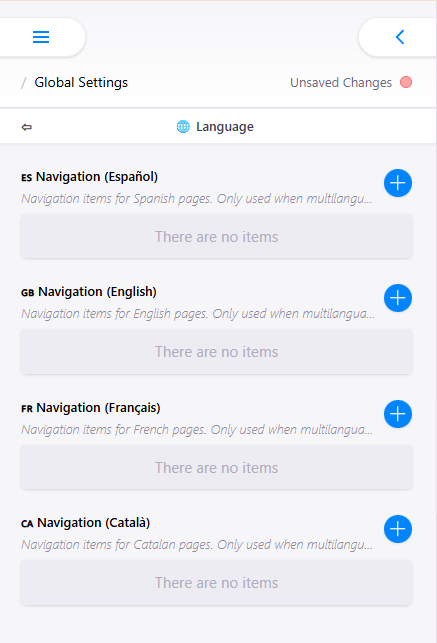
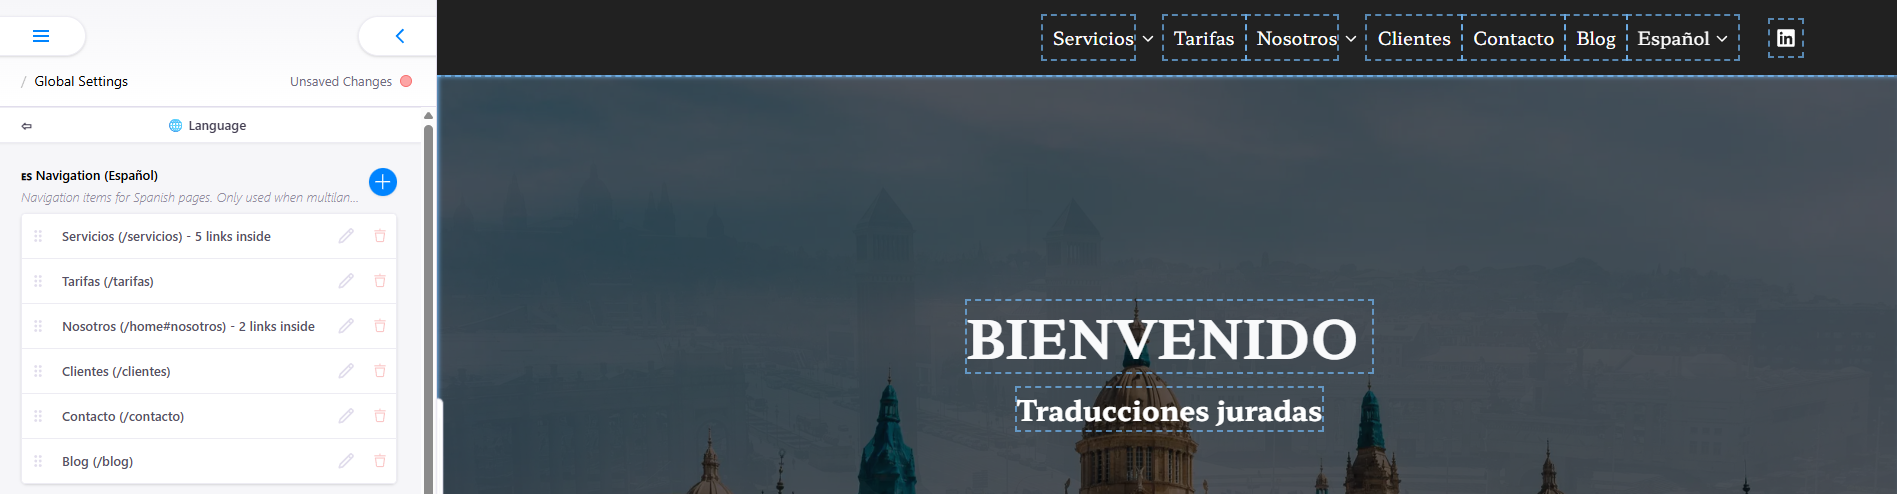
Once you finish with one language, save the changes and select the next language in the language tab to configure it (you will notice that when you change language the Header elements change), and then repeat the process and enter the desired content.
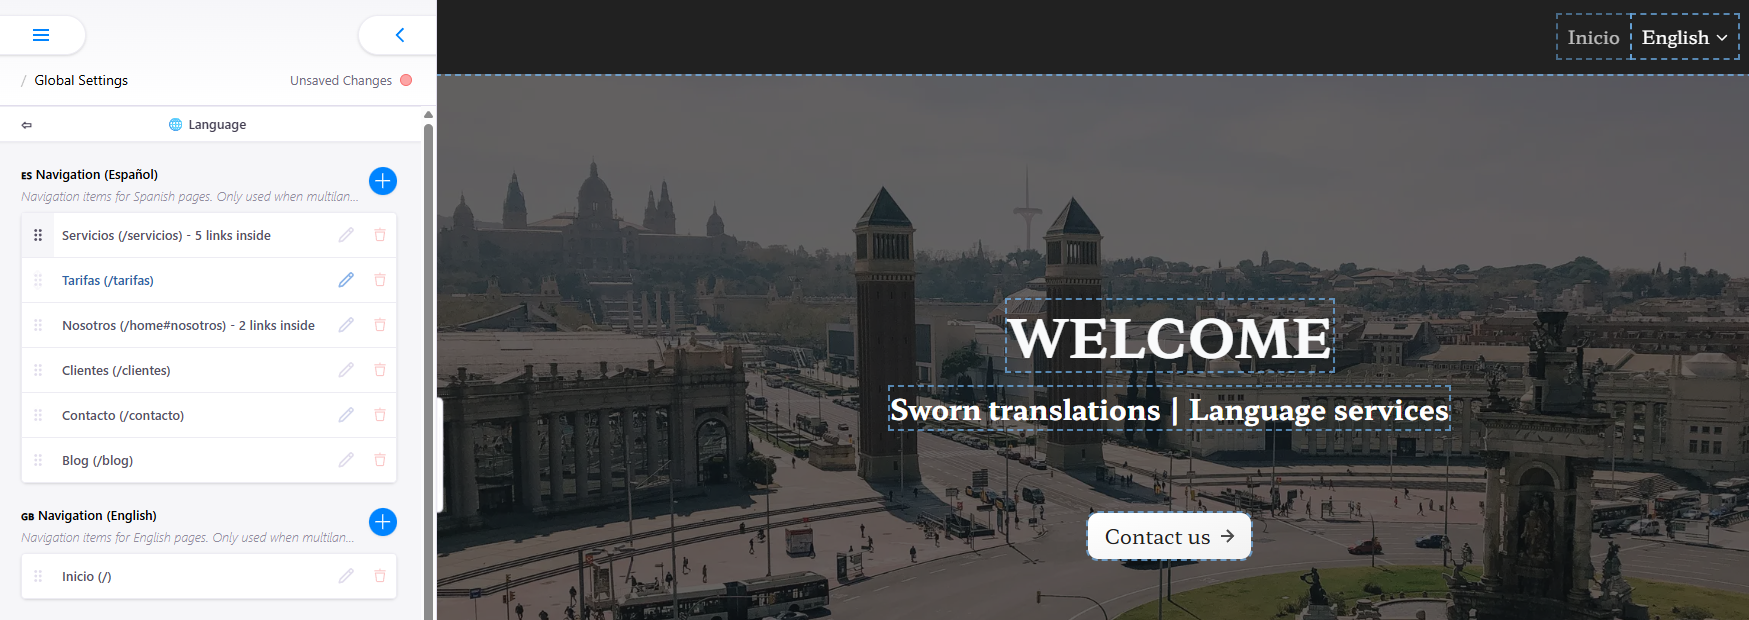
NOTE: Both the website logo and the URLs of the different social networks are common to all languages.
Adapt the Footer for each language
In the same way as the Header, you may want to show a specific footer for each language.
The process is similar to the Header: when you click on the footer with multi-language enabled, a "lenguage" option will appear that you can access to edit the footer for each language.
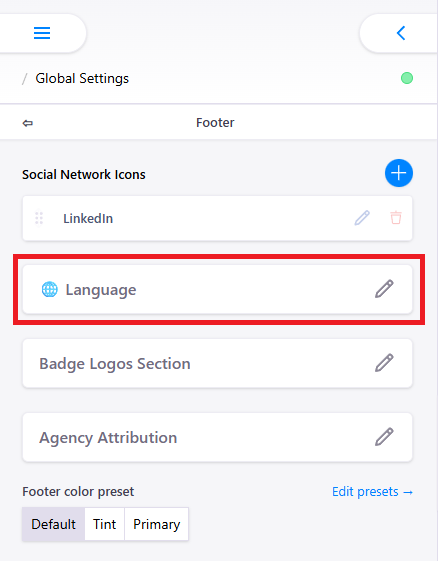
Simply select the language you want and enter the specific content for each language.
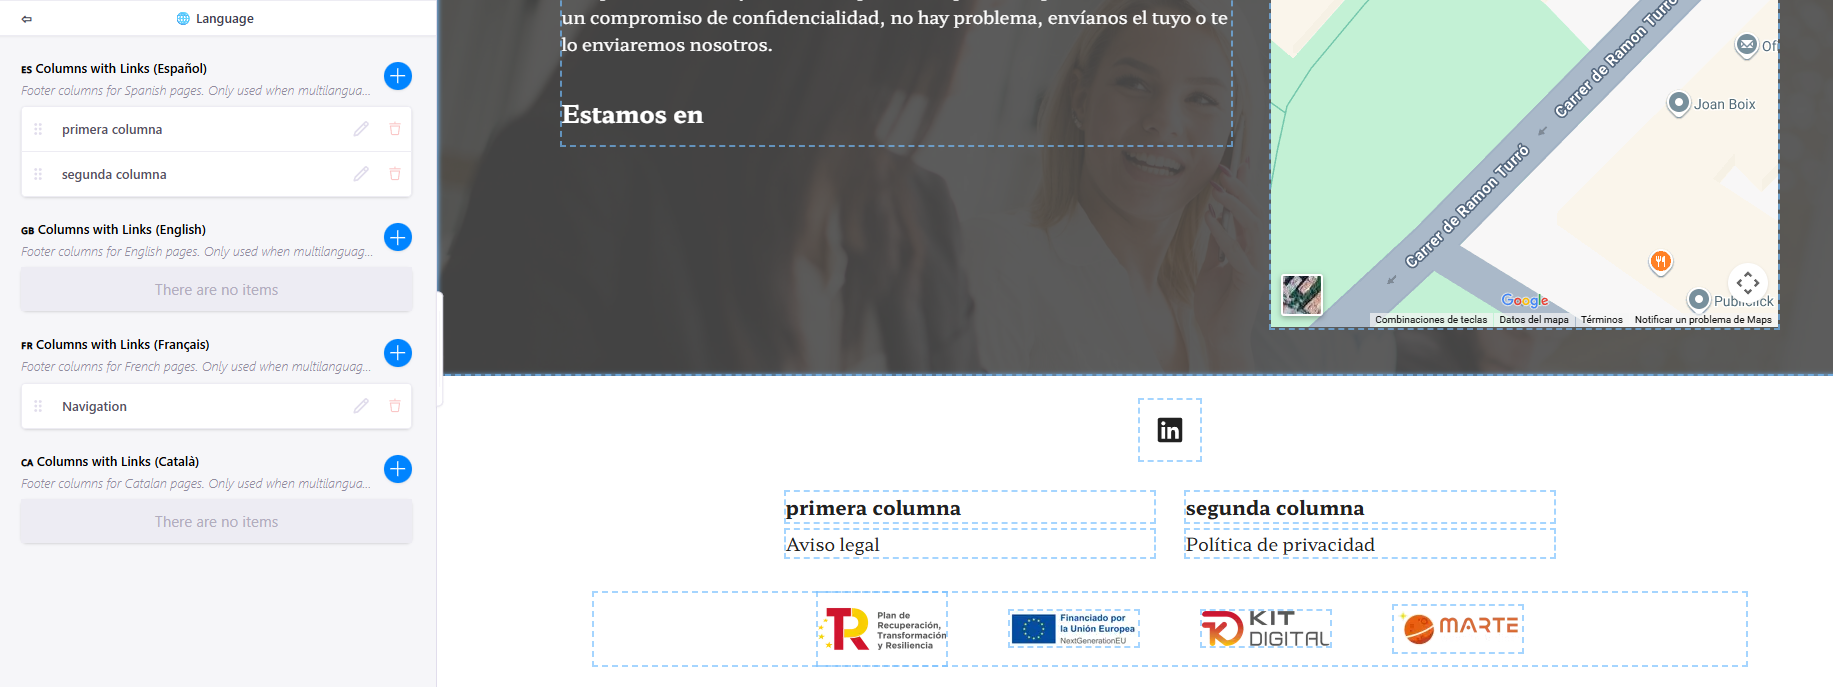
NOTES: As with the Header, when you change language you will notice that the Footer changes and shows what you have configured for that language. Common elements: the social networks section, badge logos, and Agency attribution are common fields for all languages.
How to configure your blog section to work with multi-language
The way blog posts work is very similar to how they were used before. The only new thing is that you must now fill in an additional "LENGUAGE" field where you indicate in which language you want that post to be displayed; that is, if you choose Spanish then this post will only be shown in the blog section for Spanish and will not appear in the other languages you have configured.
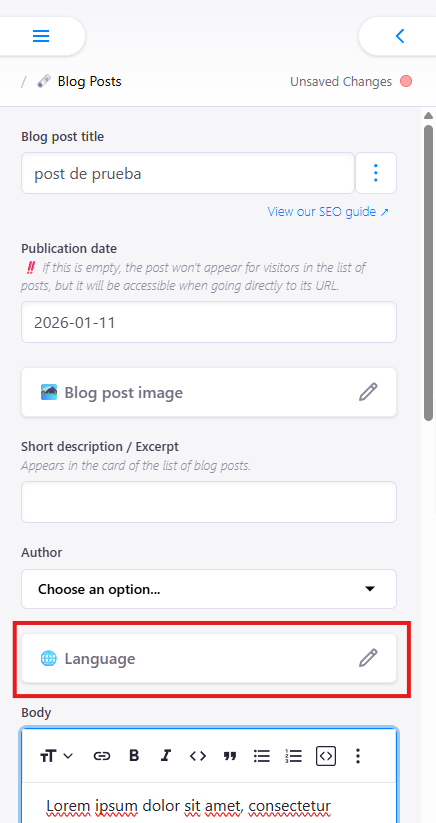
Everything else is the same; you just need to keep in mind that you will need to create a post for each language in which you want it to be displayed.
NOTE: The blog section name is shared across all configured languages.
Everything you need to know to correctly configure your links and buttons
Although it may seem like a new system, don't worry: the reality is that it is the same intuitive system as always but with some considerations.
As we did in previous versions, the link paths for your buttons must contain the full path where the file is located, with the exception of the language you have set as default, for which it is not necessary to enter the root folder name.
For example: we have a site with the default language in Spanish but which also has English. In this case, if you want to go from the Spanish home page to the contact page, the link you should place on the button would be: /contacto.
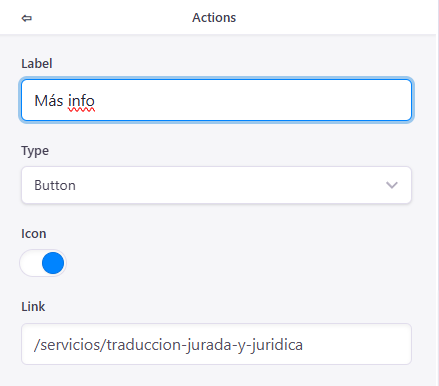
However, if you are working with a language other than the default, the link would be: /en/contact.
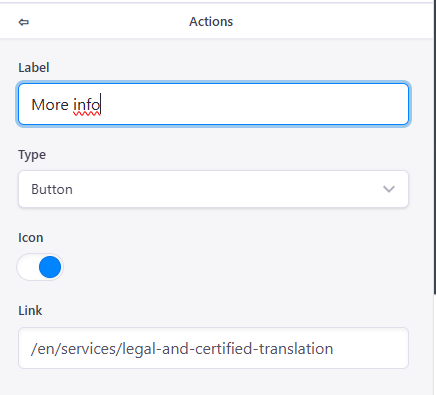
NOTE: If you have subfolders within the root folder, these must be included in the link URL (as shown in the images).